
How to Create an Angular 9 App From Scratch
By Steven McLintock onRoughly a year ago I was beginning a new job where one of the requirements was to use Angular on a daily basis. There was only one problem, I’d never used Angular before. I’d been honest in the interview, saying I’d had a brief introduction to the React framework, but not Angular. Thankfully they were understanding and I was expected to learn on the job.
As developers, we’re often capable of learning new frameworks in a relatively short amount of time. This is particularly true if we have a feature-rich application at our disposal that is already using this framework, but what about its foundations? If asked, would we know why we’re using that framework? And could we build something from scratch using it?
What is Angular?
Angular is a framework for building front-end web apps, commonly used to build Single Page Applications (SPAs). A Single Page Application will aim to replicate the capabilities of a desktop or mobile app within the browser, dynamically loading new content instead of refreshing the page. A few examples of Single Page Applications are Gmail, Trello and Netflix (the browser version).
Angular is continually maintained by Google and was released in 2010 as “AngularJS”, but shortly after was rewritten and rebranded as simply “Angular”. Angular makes use of TypeScript, a language by Microsoft that enhances vanilla JavaScript with type awareness, interfaces amongst other useful features and will compile down to plain JavaScript to be served by the browser. Angular also makes use of the npm (Node Package Manager) to install and manage dependencies in your Angular apps.
Let’s dive into the code and starting building an Angular app from scratch!
Prerequisites
To follow along with this tutorial, you’ll need to install the JavaScript runtime Node.js for Windows, macOS or Linux. I’ll also be using Visual Studio Code, but any code editor with access to a terminal window will do. OK, let’s get started!
Install the Angular CLI
Assuming you’ve got Node.js installed, let’s begin by also installing the Angular CLI, a useful command line interface for Angular.
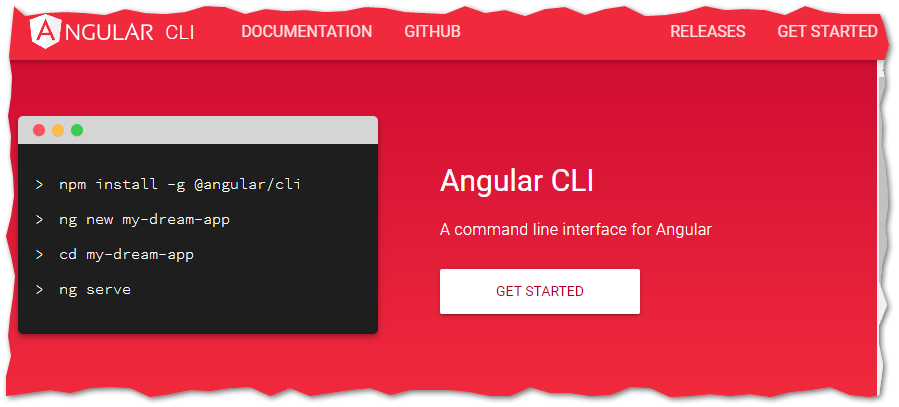
If you’re using Visual Studio Code (or a similar code editor), let’s open a new terminal window and run the command:
npm install -g @angular/cli
Once the Angular CLI is installed successfully, we’re ready to create a new Angular app from scratch.
How to Create a New Angular App
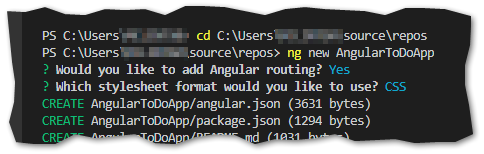
Now that we’ve got the Angular CLI installed in our development environment, we can begin by creating a new Angular app from scratch. In a terminal window, all we need to do is run one command to instruct the Angular CLI to create a new Angular app. Don’t forget to add the name of your app (in this case, “AngularToDoApp” is the name we’re specifying for the new app).
ng new AngularToDoApp
The CLI will ask you if you want to add routing to your app. It’ll also give you a choice of the stylesheet solution you want to use. I’ll be using the default options in this tutorial, but it’s nice that Angular asks you first before creating the app.
Once the CLI is finished, you’ll be ready to open the new app in Visual Studio Code (or similar code editor). In the Explorer you’ll see the various source files required to build the application; these consist of HTML, CSS and TypeScript files and we’ll also see a few JSON files used for configuration. Before we proceed, let’s build the application so we can see what our new Angular app looks like! All we need to do is run the command:
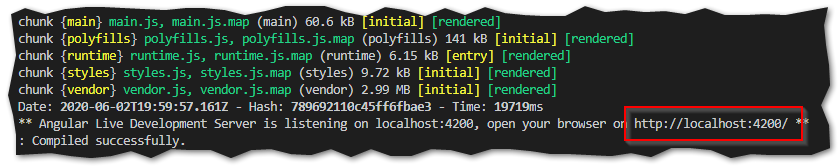
ng serve
If the app has compiled successfully (fingers crossed!), you should be presented with a URL similar to http://localhost:4200/ to view our new Angular app in the browser.
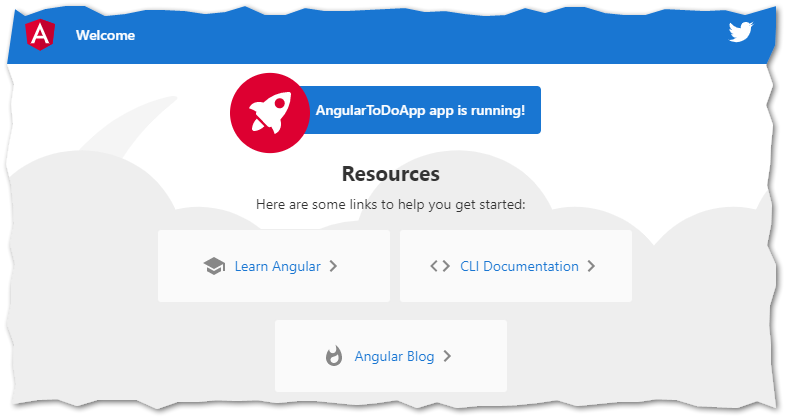
If we browse to the URL provided by the Angular CLI, we’re able to view our new Angular app!
Inspecting the Default App Component
We’ve got a new Angular app, that’s great… but how does it actually work? A large part of Angular is components and you’re new app will have one default component to begin with. Let’s have a look and see:
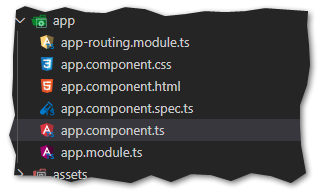
A component is essentially a small part of your application separated into a stylesheet (app.component.css), a HTML document (app.component.html) and a TypeScript document (app.component.ts). There’s also another TypeScript document used for unit testing (app.component.spec.ts). Perhaps you might decide to use one component for a navigation menu, another for a contact form and another for your page footer. It’s up to you.
Data Binding
One of the many ways to communicate between TypeScript and HTML in a component is by using data binding. If the TypeScript is retrieving data from an API endpoint (for example), we could use data binding to display that data to the user. There’s actually an example of data binding being used in the default app component:

If you inspect the TypeScript of the default app component, you’ll see a variable is being set with the name of our new app:
app.component.ts
export class AppComponent {
  title = 'AngularToDoApp';
}
In the HTML of the default app component, you’ll see the same variable is surrounded by curly braces to instruct Angular to display the title of your app in the user interface:
app.component.html
<span>{{ title }} app is running!</span>
How to Create a New App Component
That’s fine if we’re happy to keep using the default app component, but almost always you’ll want to create your own components, so let’s do that. Using the Angular CLI, let’s run the command to create a new component of our own (in this case “to-do” is the name of our new component):
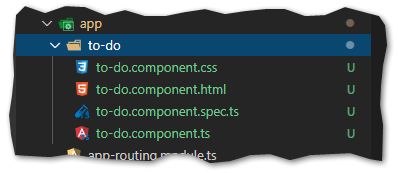
ng generate component to-do
Once the Angular CLI has finished, you’ll see a new folder with your new component!
To give you an example of how we can quickly add a bit of functionality to this new component, we’ll add a form thats only purpose is to add a new to-do item to a list of to-dos. This will demonstrate how Angular can be easily used to create a Single Page Application (SPA).
to-do.component.ts
In to-do.component.ts we’ll initialize a couple of variables for holding the title of the component as well as the array of to-do items. We’ll also need to initialize a new “FormGroup” for adding the new to-do items to the array. You’ll also see the “ngOnInit” method that’s used by Angular whenever the component is first initialized, and also the custom method “onSubmit” that’s called when the HTML form is submitted.
import { Component, OnInit } from '@angular/core';
import { FormGroup, FormBuilder } from '@angular/forms';

@Component({
  selector: 'app-to-do',
  templateUrl: './to-do.component.html',
  styleUrls: ['./to-do.component.css']
})
export class ToDoComponent implements OnInit {

  title: string;
  todos: string[];
  formGroup: FormGroup;

  constructor(private formBuilder: FormBuilder) {
    this.formGroup = this.formBuilder.group({
      add: ''
    });

    this.todos = [];
   }


  ngOnInit(): void {
    this.title = "To Do App";
  }

  onSubmit() {
    var item = this.formGroup.controls['add'].value;

    this.todos.push(item);

    this.formGroup.reset();
  }

}
to-do.component.html
In to-do.component.html we’ll add the HTML for a H1 tag as well as a form for submitting a new to-do item. We’ll also use the ngSubmit directive to submit to the method in the component, in addition to ngFor for looping through the array of to-do items so we can display them to the user. Because of data binding the list of to-do items will be automatically updated whenever the form is submitted, without having to refresh the page!
<h1>{{ title }}</h1>
<form [formGroup]="formGroup" (ngSubmit)="onSubmit()">
    <input type="text" placeholder="Add New To Do" formControlName="add" />
    <button type="submit">Add To Do</button>
</form>
<ul id="todo-list" *ngFor="let todo of todos">
    <li class="todo-item">{{ todo }}</li>
</ul>
to-do.component.css
Lastly, let’s update the CSS document to-do.component.css to add some CSS meant for only this component:
h1 {
    font-family: Arial, Helvetica, sans-serif;
    color: blue;
}
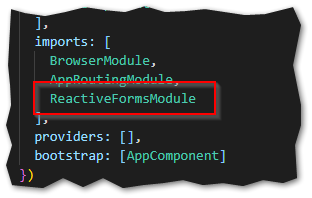
Add Reference to ReactiveFormsModule
Before the new app component is ready to test, we’ll need to add a reference to the required dependency “ReactiveFormsModule” in the app.module.ts file, otherwise Angular will complain and throw an exception.
Update the Default App Component
We’re almost ready to test our new Angular app! For our new app component to be testable in the browser, we’ll need to tell Angular to display it. For this tutorial, let’s simply remove the HTML in the default app component (app.component.html) and replace it with HTML to reference the new app component we created. To do this we’ll use the selector property at the top of to-do.component.ts. This will tell the default app component to display the new component.
Let’s change the content of app.component.html to:
<app-to-do></app-to-do>
All that’s left to do now is test our new Angular app! Let’s run the command to build the app and be able to view it in the browser:
ng serve
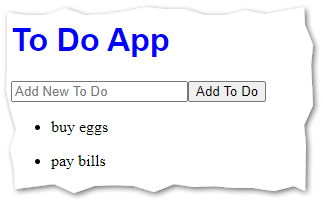
I don’t know about you, but I always find it easier to learn a new framework once I’ve got a basic app to work with. Hopefully this helps you begin learning Angular, I know it helped me!