
Creating a Web API Using Only the .NET CLI and Visual Studio Code
By Steven McLintock onHave you ever wondered if you could use the .NET CLI and Visual Studio Code to build a new .NET application, instead of relying on Visual Studio to do all of the heavy lifting?
This tutorial will walk you through creating a new class library, unit test project and web API using only the .NET CLI and Visual Studio Code.
Prerequisites
- .NET 5.0 CLI (or later)
- Visual Studio Code for macOS, Windows or Linux
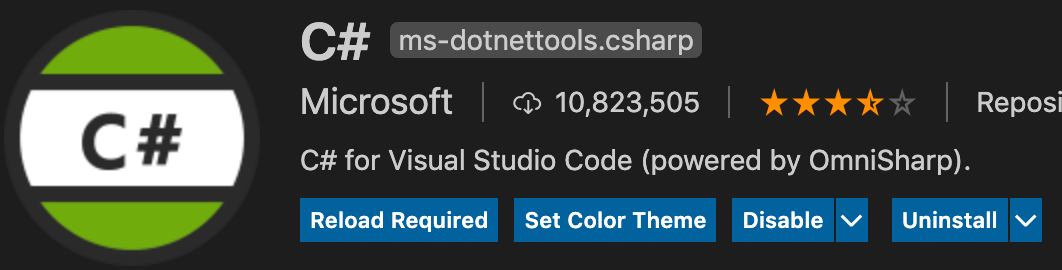
- Install the C# extension by Microsoft for Visual Studio Code
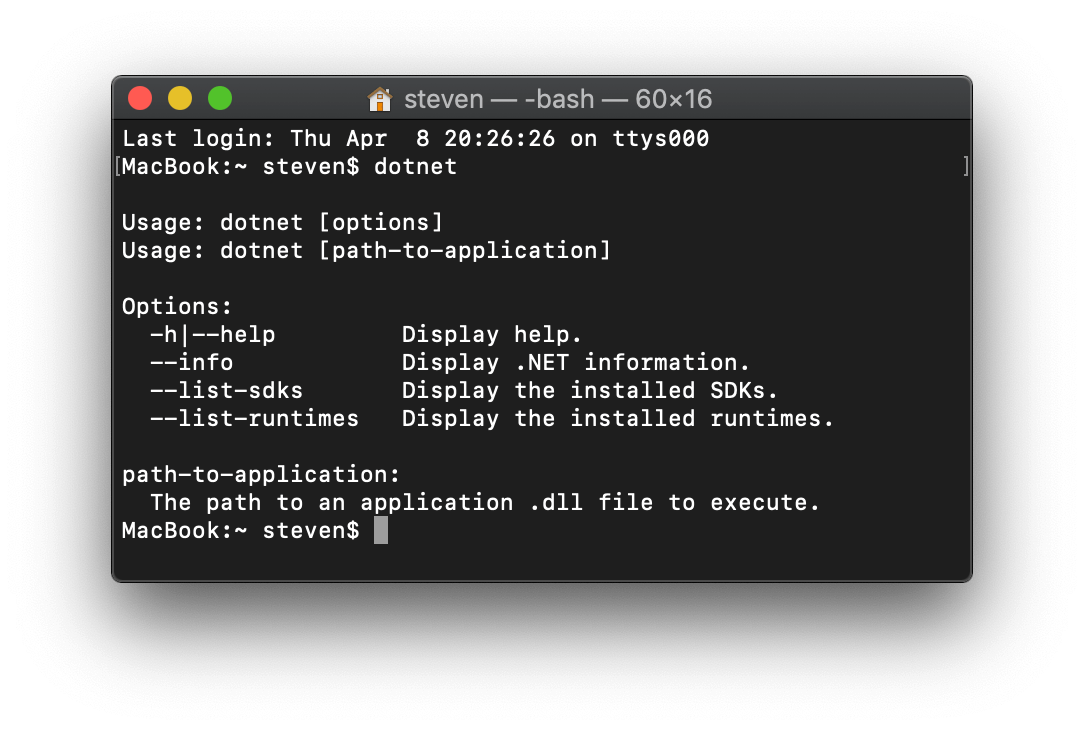
Before we get started, let’s first check if the .NET CLI is installed correctly by running the following command in the Terminal:
dotnet
If the .NET CLI is installed on your system (macOS in this example) you should see the following:
Create a New Solution
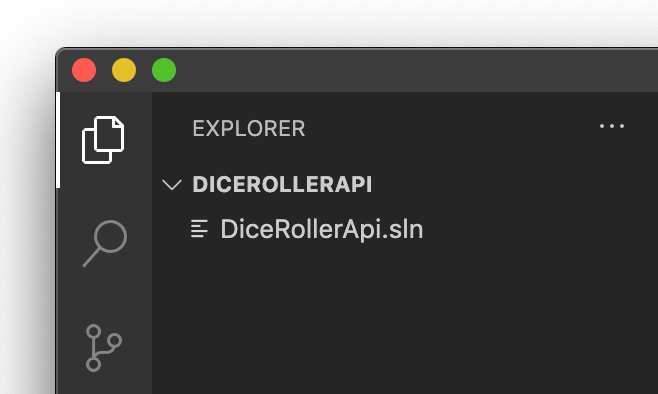
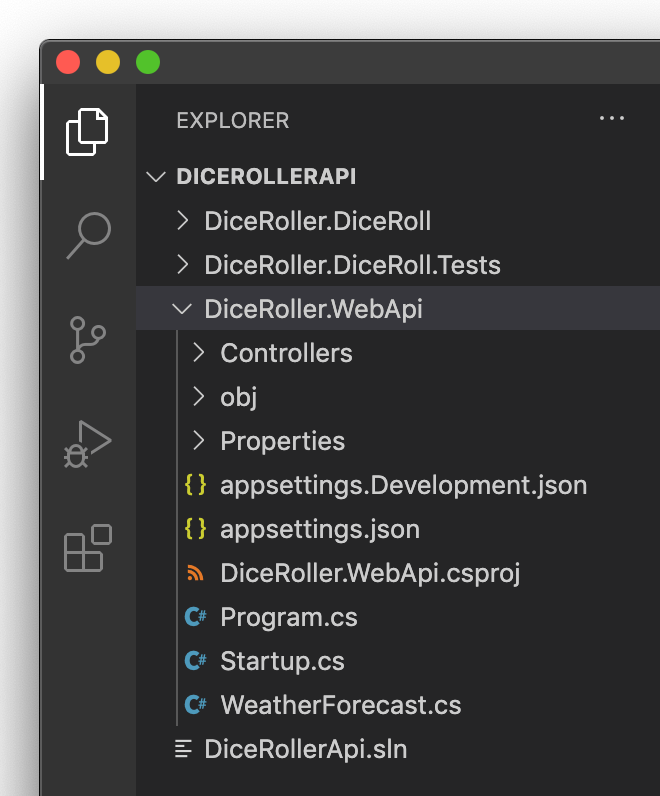
Let’s begin by creating a new folder for storing the solution and project files. In this example the folder will be named ‘DiceRollerApi’.
Open the new folder in Visual Studio Code and open a new integrated terminal (View > Terminal). This is where we’ll be running all of the .NET CLI commands in this tutorial.
Let’s create a new solution file using the command:
dotnet new sln

The solution file will be automatically named the same as the directory you currently reside in. In this case the solution file is named ‘DiceRollerApi.sln’.
If you would like to explore all of the commands available in the .NET CLI, you can check out the Microsoft dotnet command documentation.
Why Use a Solution in Visual Studio Code?
The solution file is traditionally used by Visual Studio to keep track and organize all of the project files in your application. However, the solution file isn’t necessarily required in Visual Studio Code, it’s optional.
There are a couple of reasons why you might want to use a solution file in Visual Studio Code:
- If you or another developer would like to maintain the application in Visual Studio in addition to Visual Studio Code
- Instead of building each project separately using the .NET CLI, we can use the command ‘dotnet build DiceRollerApi.sln’ to build the entire solution.
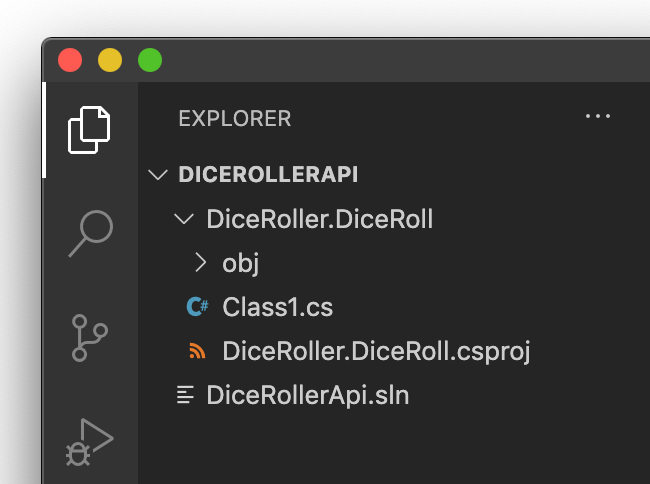
Create a New Class Library
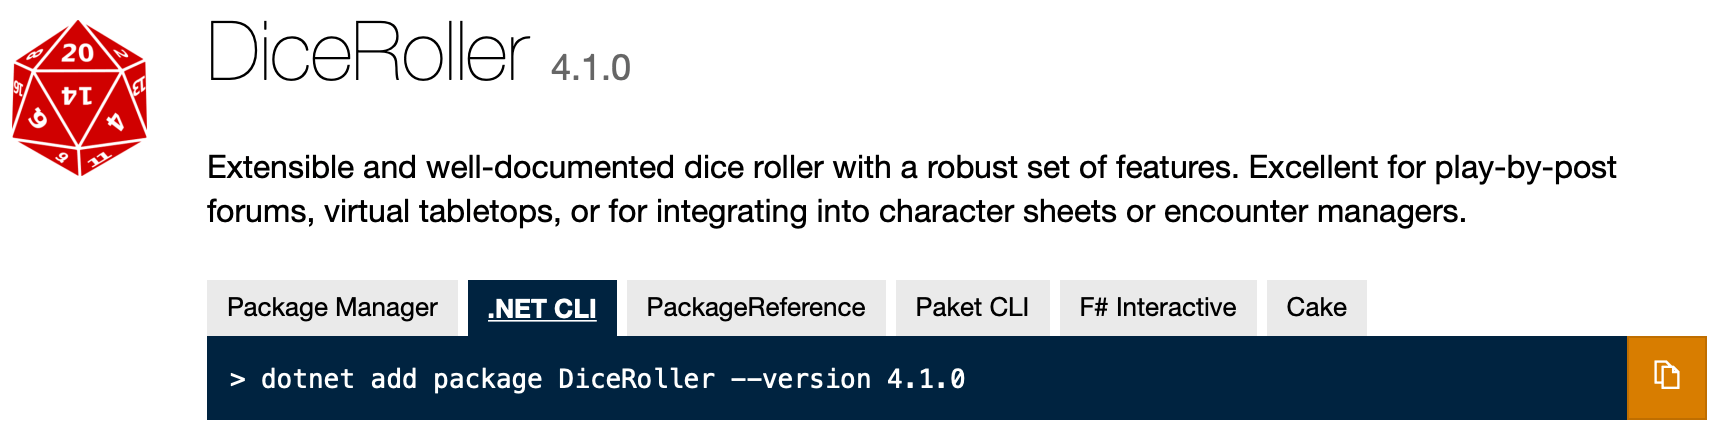
We’ll create a new class library that will use the NuGet package DiceRoller to roll one or many dice.
Our class ‘RollDice’ will contain the method ‘Roll’ that accepts two parameters, the number of dice to use in our roll, and how many sides each die will have. Let’s create the new class library ‘DiceRoller.DiceRoll’ by using the following command:
dotnet new classlib -n DiceRoller.DiceRoll
Because we’re using the .NET CLI and Visual Studio Code, we’ll need to add the new project to our solution file manually, so let’s do that using the command:
dotnet sln add DiceRoller.DiceRoll/DiceRoller.DiceRoll.csproj

We’ll also use the .NET CLI to add the DiceRoller NuGet package to the ‘DiceRoller.DiceRoll’ class library:
dotnet add DiceRoller.DiceRoll/DiceRoller.DiceRoll.csproj package DiceRoller
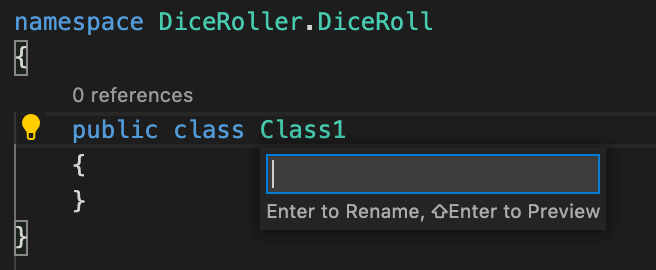
Let’s rename the auto-generated class ‘Class1’ to ‘RollDice’. Visual Studio Code doesn’t seem to automatically rename the file, so be sure to rename the file to ‘RollDice.cs’ as well.
We’ll also add in the code to call the ‘DiceRoller’ NuGet package and pass in our desired parameters. There’s also an interface being used that will come in later when we use dependency injection in the web API.
using Dice;

namespace DiceRoller.DiceRoll
{
    public class RollDice : IRollDice
    {
        public decimal Roll(int numberOfDice, int sidesPerDie)
        {
            string diceExpr = $"{numberOfDice}d{sidesPerDie}";
            RollResult rollResult = Roller.Roll(diceExpr);
            return rollResult.Value;
        }
    }
}
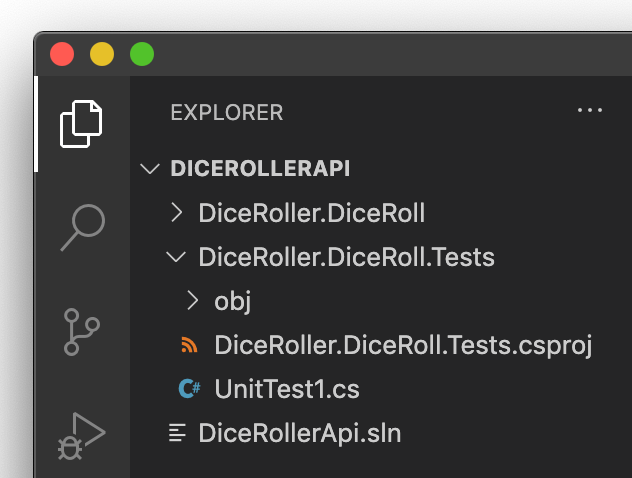
Create a New Unit Test Project
The .NET CLI has the ability to add any kind of .NET project, including unit test projects using either the MSTest, NUnit or xUnit testing framework. Let’s add a unit test project to test our class library:
dotnet new mstest -n DiceRoller.DiceRoll.Tests
We’ll also add the new unit test project to our solution file:
dotnet sln add DiceRoller.DiceRoll.Tests/DiceRoller.DiceRoll.Tests.csproj
To use the class library in a unit test, we need to add a reference to the class library in our unit test project:
dotnet add DiceRoller.DiceRoll.Tests/DiceRoller.DiceRoll.Tests.csproj reference DiceRoller.DiceRoll/DiceRoller.DiceRoll.csproj
And of course, let’s rename the auto-generated ‘UnitTest1’ to ‘RollDiceTests’ and write a unit test to ensure the result that’s returned from a roll of the dice is what we expect:
using Microsoft.VisualStudio.TestTools.UnitTesting;

namespace DiceRoller.DiceRoll.Tests
{
    [TestClass]
    public class RollDiceTests
    {
        private RollDice _classUnderTest;

        [TestInitialize]
        public void Initialize() => _classUnderTest = new RollDice();

        [TestMethod]
        public void Roll_IsSuccess()
        {
            int numberOfDice = 3;
            int sidesPerDie = 12;

            decimal roll = _classUnderTest.Roll(
                numberOfDice, sidesPerDie);

            Assert.IsTrue(roll >= 3);
            Assert.IsTrue(roll <= 36);
        }
    }
}
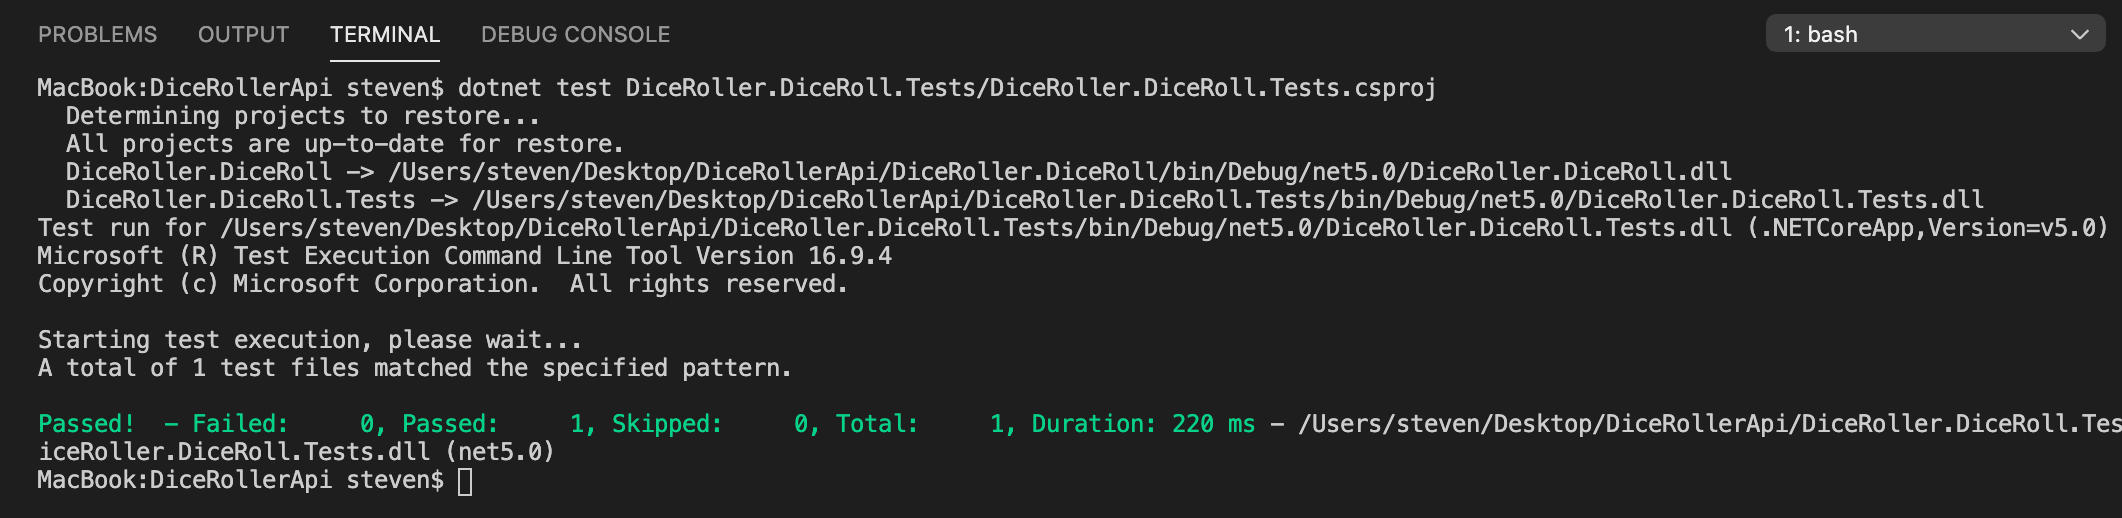
Using the .NET CLI, let’s run all of the unit tests within our new unit test project:
dotnet test DiceRoller.DiceRoll.Tests/DiceRoller.DiceRoll.Tests.csproj
In the integrated terminal, you should receive information on the results of your unit tests (hopefully they pass!):
Create a New Web API Project
With scaffolding being built into the .NET CLI, we can use one command to create a web API with an auto-generated controller, ‘Startup.cs’ file and all of the necessary dependencies added as references.
Let’s use the following command to create a new web API with scaffolding:
dotnet new webapi -n DiceRoller.WebApi
Don’t forget to add the new web API project to the solution file:
dotnet sln add DiceRoller.WebApi/DiceRoller.WebApi.csproj
Similar to the unit test project, we’ll also add a reference to the class library in our web API project:
dotnet add DiceRoller.WebApi/DiceRoller.WebApi.csproj reference DiceRoller.DiceRoll/DiceRoller.DiceRoll.csproj
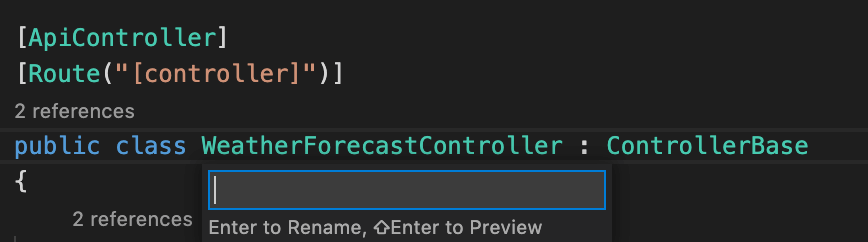
Let’s rename the auto-generated controller from ‘WeatherForecastController’ to ‘RollDiceController’ and add a new endpoint to pass the parameters ‘numberOfDice’ and ‘sidesPerDie’ to the ‘Roll’ method in the class library:
using Microsoft.AspNetCore.Mvc;
using Microsoft.Extensions.Logging;
using DiceRoller.DiceRoll;

namespace DiceRoller.WebApi.Controllers
{
    [ApiController]
    [Route("[controller]")]
    public class RollDiceController : ControllerBase
    {
        private readonly ILogger<RollDiceController> _logger;
        private readonly IRollDice _rollDice;

        public RollDiceController(
            ILogger<RollDiceController> logger,
            IRollDice rollDice)
        {
            _logger = logger;
            _rollDice = rollDice;
        }

        [HttpGet]
        public decimal Roll(int numberOfDice, int sidesPerDie) =>
            _rollDice.Roll(numberOfDice, sidesPerDie);
    }
}
Using the interface in the class library, we’ll modify the ‘ConfigureServices’ method in the ‘Startup.cs’ file to inject the ‘RollDice’ class into our web API controller:
public void ConfigureServices(IServiceCollection services)
{
    ...

    services.AddSingleton<IRollDice, RollDice>();
}
Because we’ve been adding each project to the solution file, we can now use one command to build all of the projects and check for any errors:
dotnet build DiceRollerApi.sln
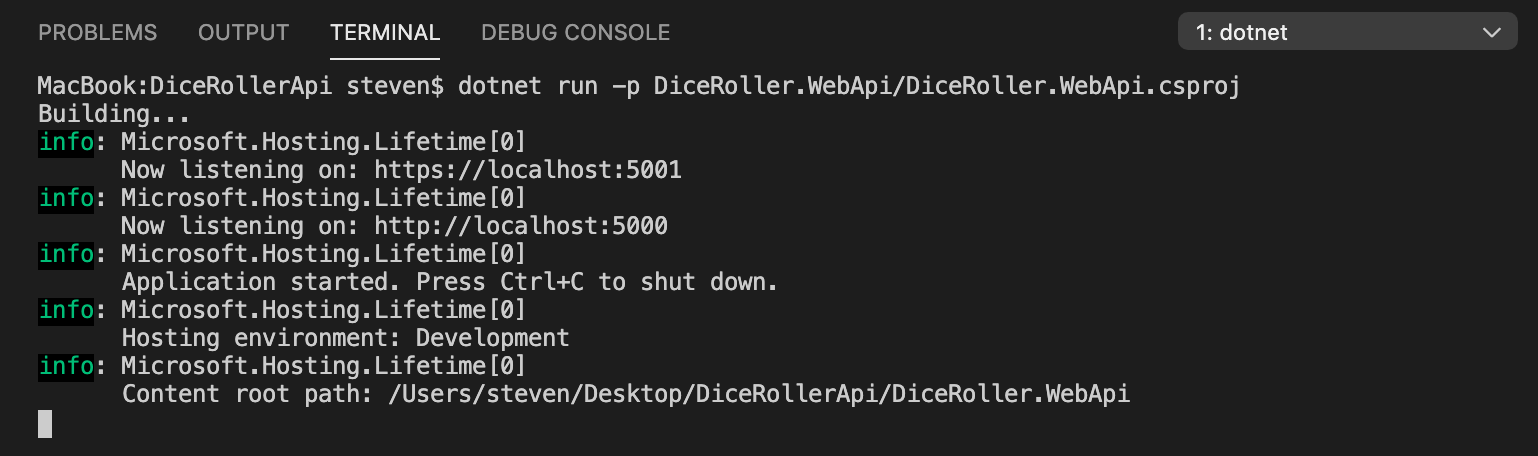
Now let’s use the .NET CLI to locally run our web API!
dotnet run -p DiceRoller.WebApi/DiceRoller.WebApi.csproj
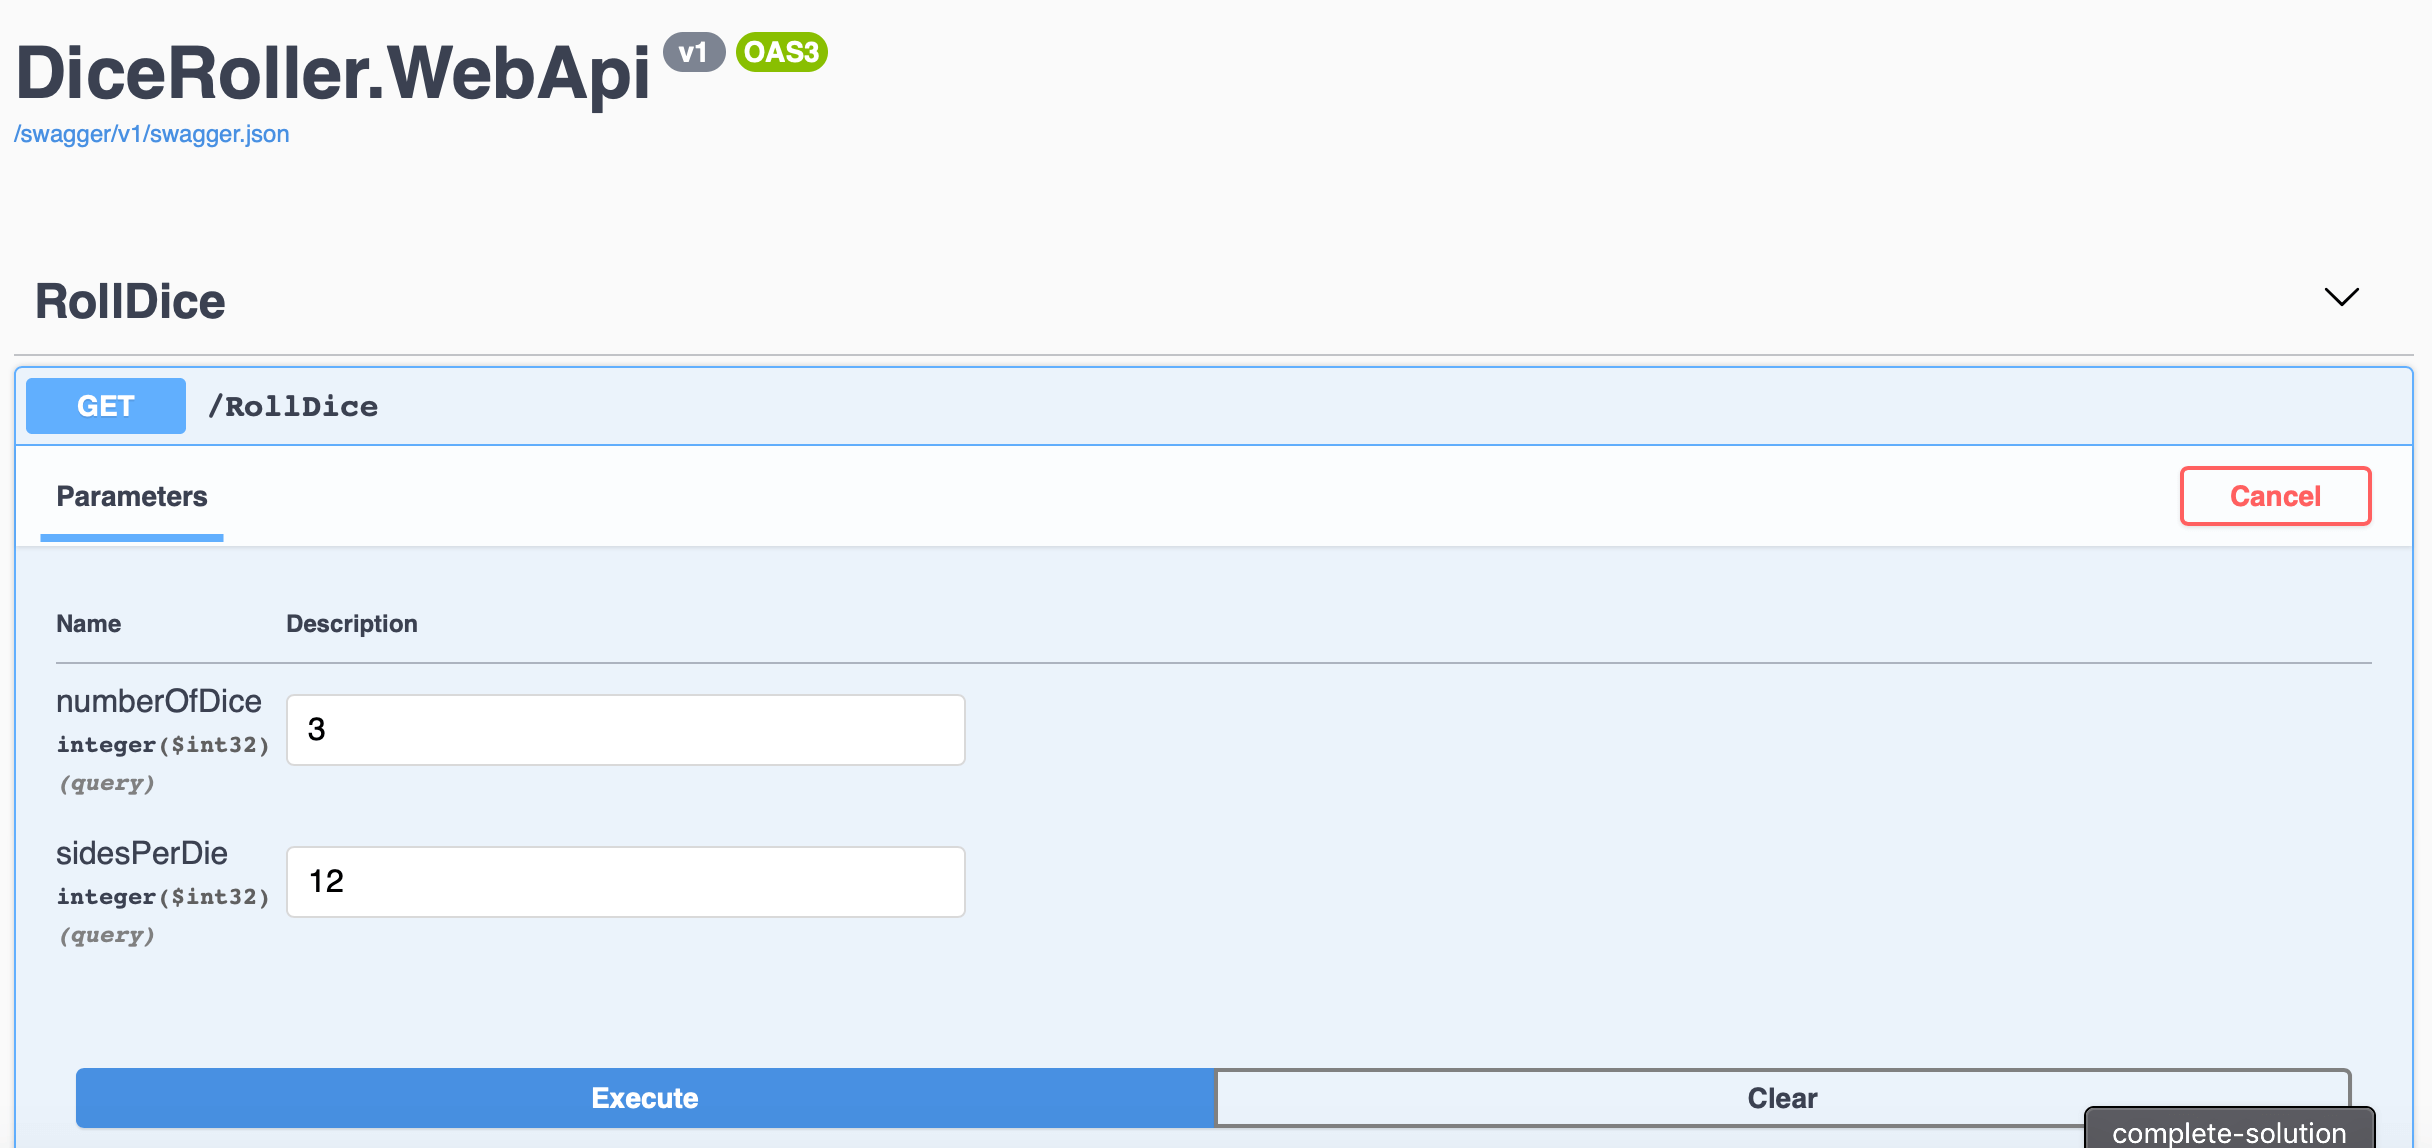
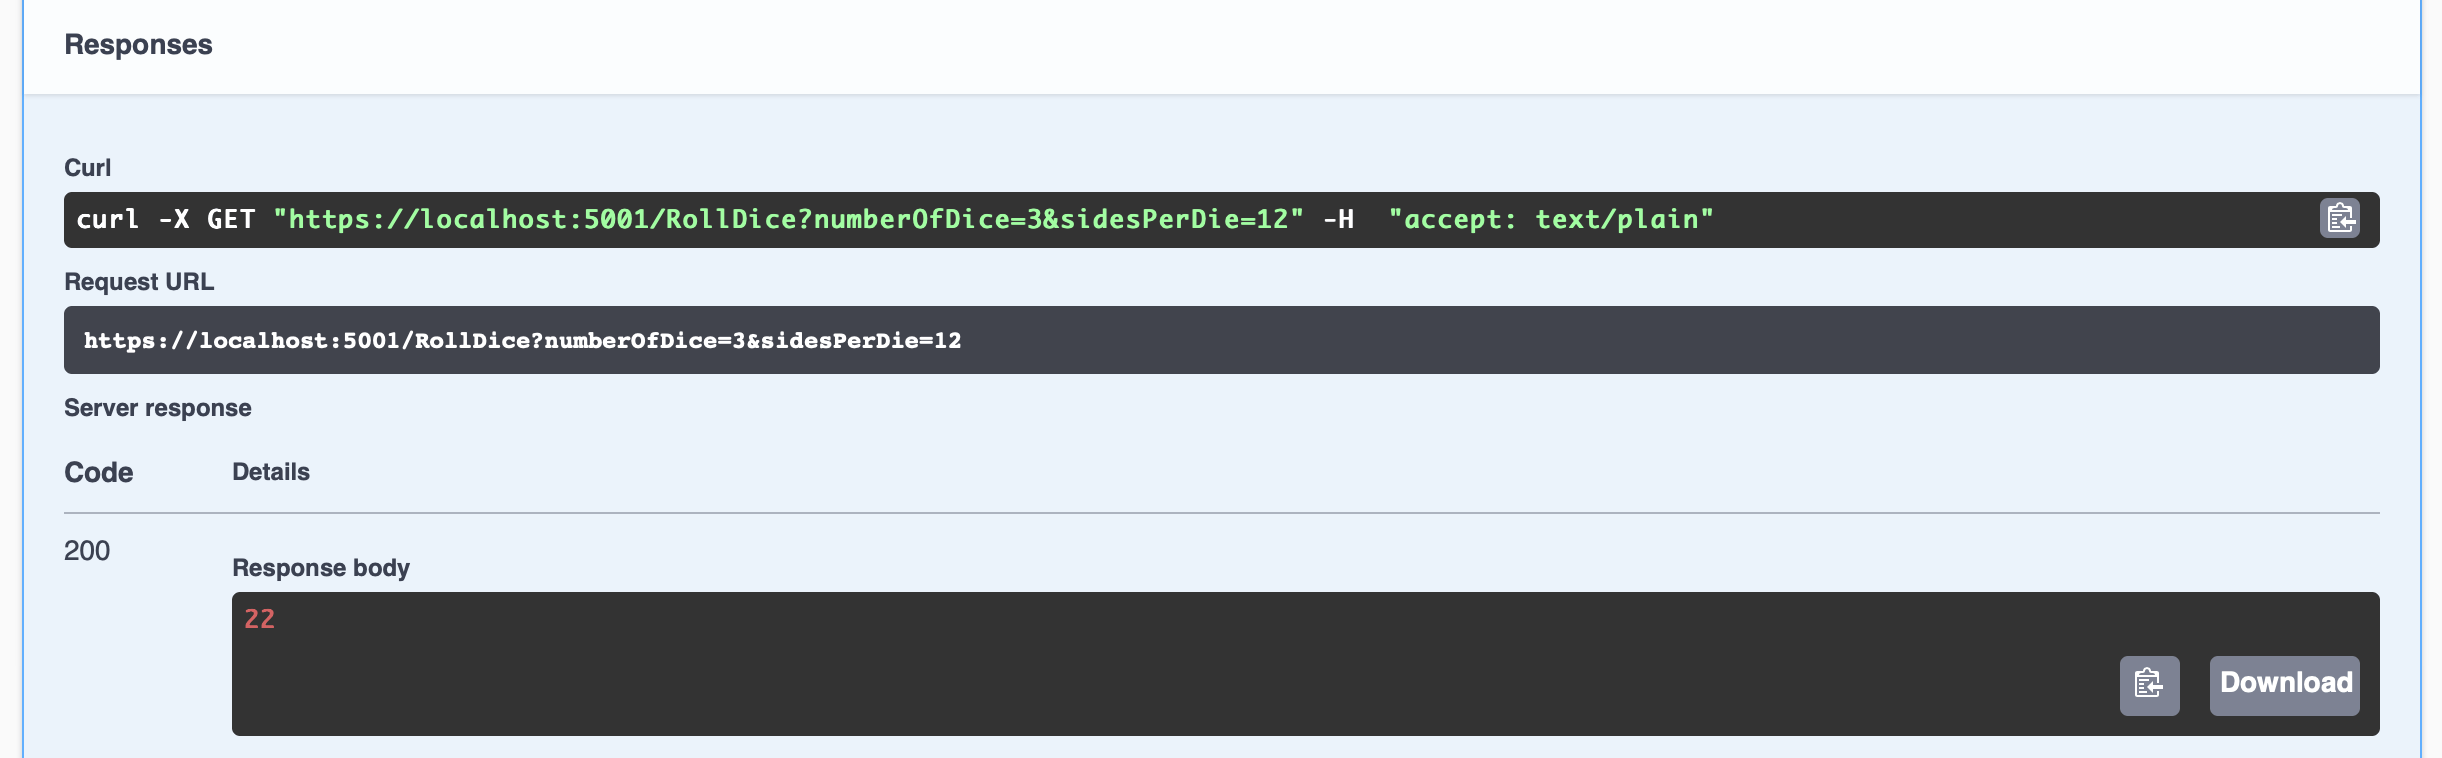
Now that the web API is running locally, we can navigate to https://localhost:5001/swagger and use Swagger to check if our endpoint is working the way we expect:
I hope this demonstrates how you can use only the .NET CLI and Visual Studio Code to build a web API!