Azure Logic Apps: How to use Microsoft’s Serverless & Codeless Integration Platform
By Steven McLintock onAzure Logic Apps is a powerful serverless integration platform released by Microsoft in 2016. The definition of a 'Logic App' is open to interpretation (in my opinion), as the user defines what the Logic App is by integrating many different applications and services to accomplish their goal.
No knowledge of code is required, and you only pay for what you use! If a task is scheduled to run for one hour a day, you only pay for that one hour. Also, as Logic Apps are 'serverless', there is no IIS or Apache in sight.
The benefits of Azure Logic Apps:
- No web server to configure
- No knowledge of code required (use the visual designer instead!)
- Use Visual Studio extension to commit to source control
- Hundreds of connectors to create a workflow that meets your requirements
Visual Designer
Under the hood, a Logic App is simply a JSON object that is interpreted by Azure to execute the applications and services in the order you configure. To use Logic Apps and compose the JSON object, Microsoft has created the 'visual designer' to make it effortless!
You can either use the 'visual designer' in the Azure portal, or by installing the Visual Studio extensions Logic App Tools for Visual Studio 2017 or Azure Logic Apps for Visual Studio Code (Preview).
Let's Connect
No… I don't mean that kind of connect! What I do mean is… let's discuss the concept of 'connectors' in Azure Logic Apps.
'Connectors' are integral to building a workflow that will accomplish your goal and can be grouped into the following categories:
- Built-ins (triggers, actions, e.g. schedules, incoming HTTP requests)
- Control workflow (if statement, for loop, switch statement, etc.)
- Manage or manipulate data (parse and compose JSON, set variables)
- Managed API connectors (integrate with third-party APIs, e.g. Twitter)
- On-premise connectors (use your on-premise SQL server and/or file storage!)
- Integration account connectors (encoding, decoding and transformation)
- Enterprise connectors (enterprise-level integration)
Getting Started
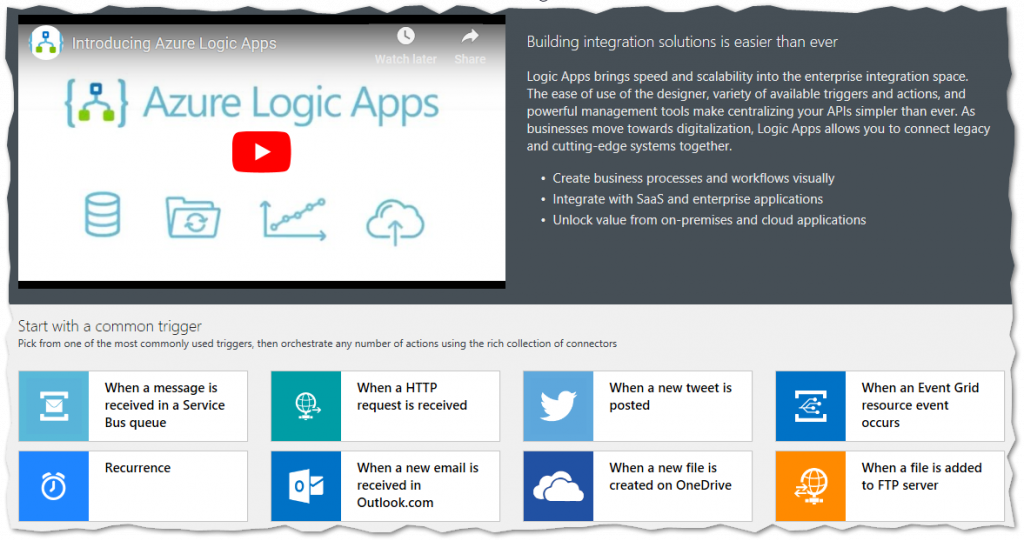
Logic Apps can be designed in either the Azure Portal, or alternatively Visual Studio. If you work amongst a team of developers, I would recommend using Visual Studio to take advantage of source control to use branches, create pull requests and track changes.
For this demo, we’ll use Visual Studio 2017 and the ‘Azure Logic App Tools for Visual Studio 2017’ extension.

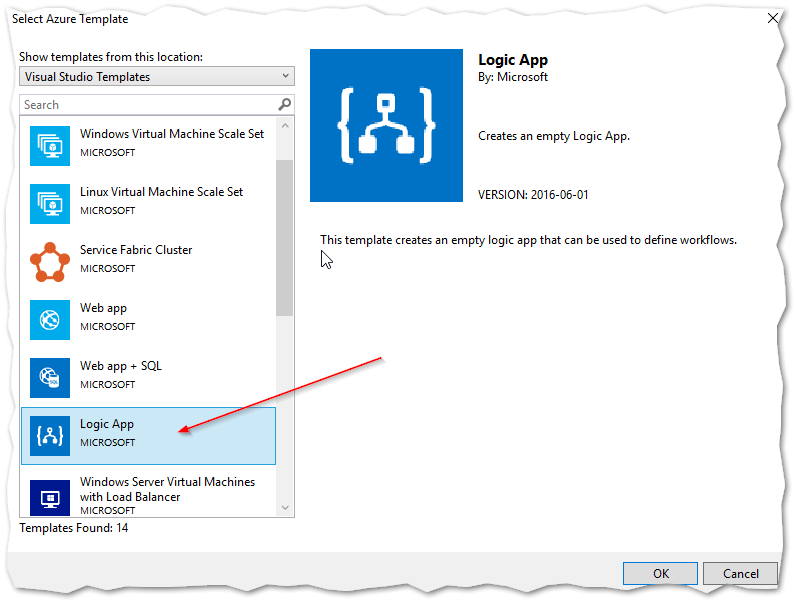
Let’s create a new project in Visual Studio and use the ‘Azure Resource Group’ template:

Select ‘Logic App’ to create an empty Logic App:
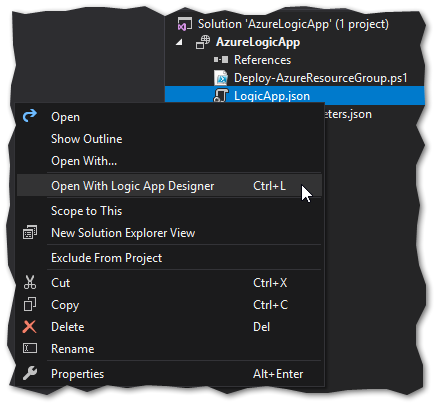
Once the Solution Explorer is visible, use the keyboard shortcut Ctrl+L or the context menu to open the Logic App in the visual designer:
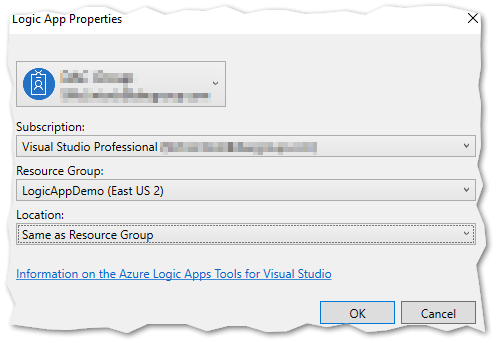
Visual Studio will prompt you to confirm the Azure subscription and resource group. This is for billing and organization purposes.
You will now see the Visual Designer in Visual Studio, just as it appears in the Azure Portal!
Create the Logic App
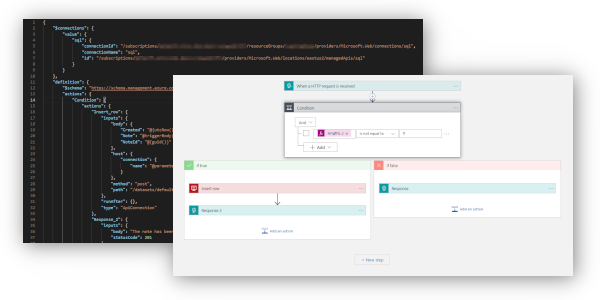
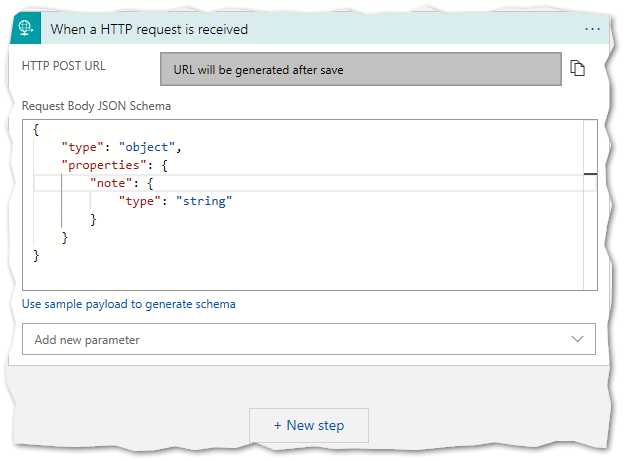
For this demo, we’ll use the trigger ‘When a HTTP request is received’. This is so we can use the Postman client to trigger the Logic App using a POST request.
The purpose of this new Logic App is to create an API endpoint to insert a new note into an existing SQL Server database. Let’s support this functionality in the HTTP trigger request body:
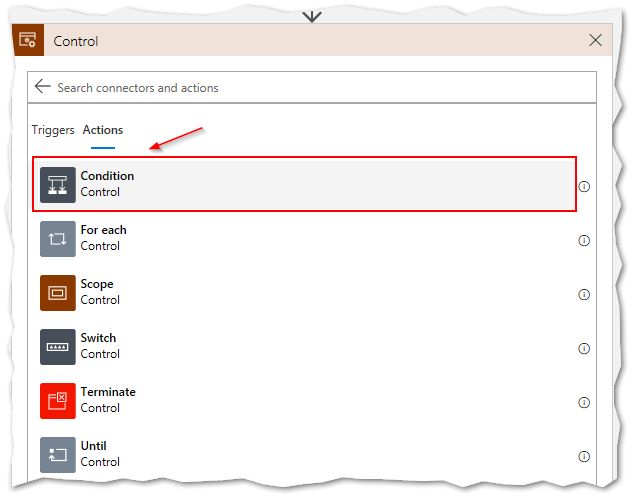
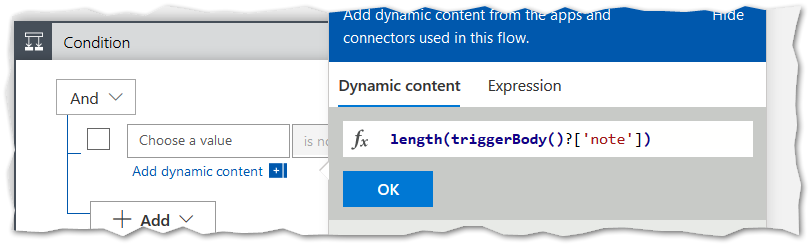
We need validation to ensure a user does not submit an empty note, so let’s add a ‘condition’ connector. This is essentially an if statement that will result in either true, or false.
Let’s write an expression in the ‘Choose a value’ field of the condition to determine if the note is empty or not:
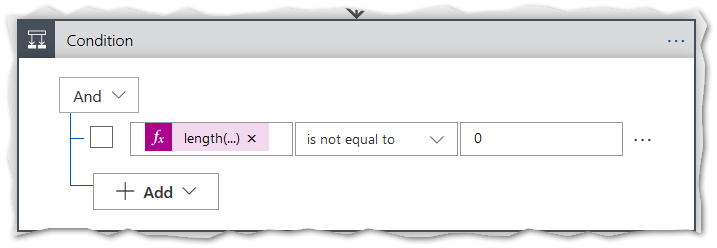
When you are finished, the condition should look similar to:
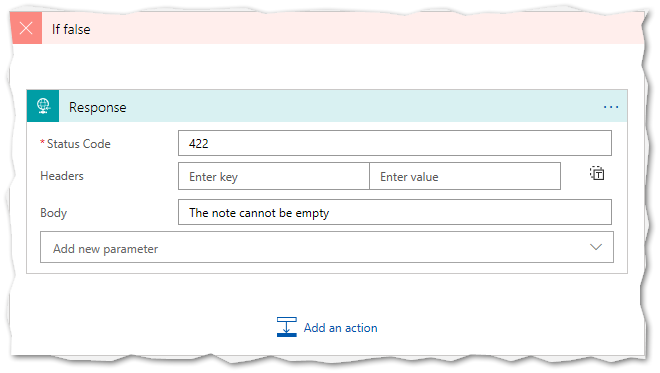
If the condition is false, we’ll use a ‘response’ connector to return the corresponding status code (422) and a friendly error message:
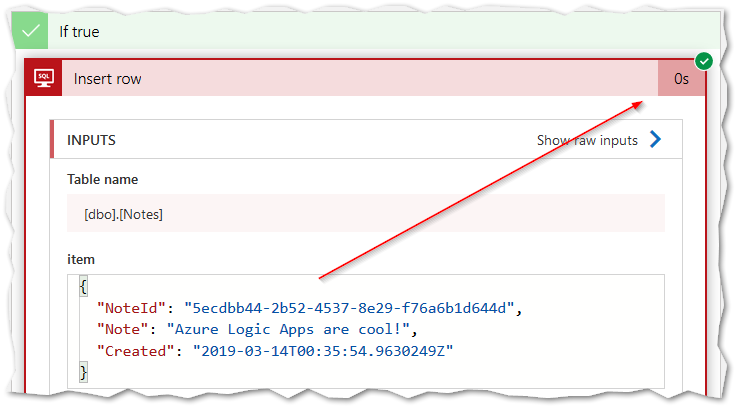
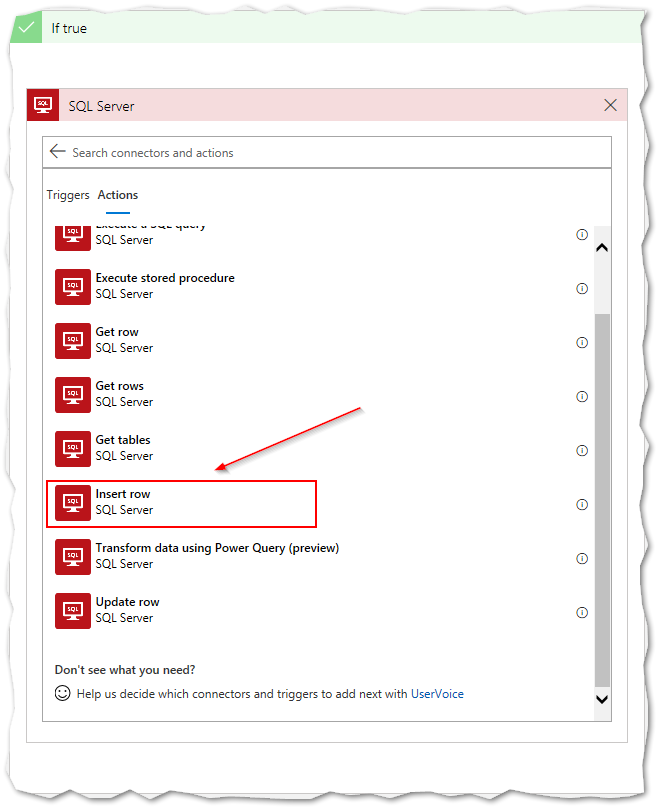
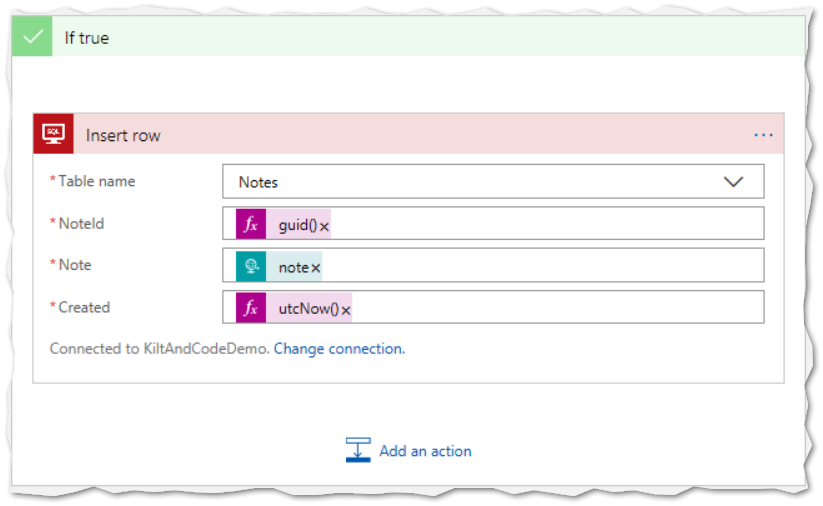
If the condition is true, we’ll use the ‘SQL Server’ connector to insert the note into our existing database:
Use the built-in expressions and dynamic content to insert the note and it’s associated metadata into the database:
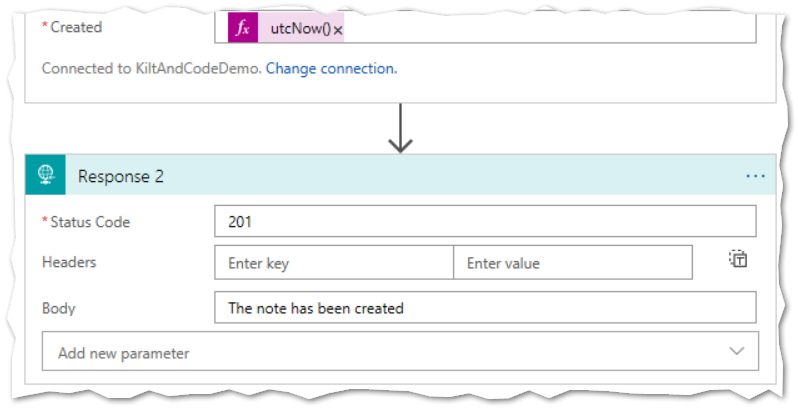
Finally, use a ‘response’ connector to return a ‘Created’ status code (201):
Deploy the Logic App
Now we’re ready to deploy to Azure from within Visual Studio! Doing so will assign a HTTPS web address to the Logic App and allow us to trigger it using a POST request.
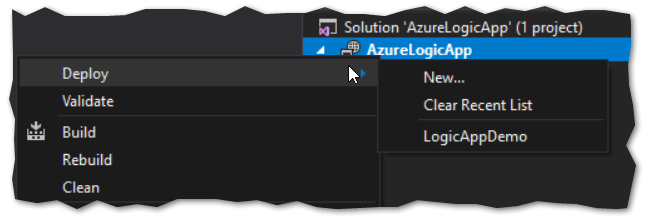
Right-click on the project and click ‘Deploy’ to configure the options to deploy to a resource group:

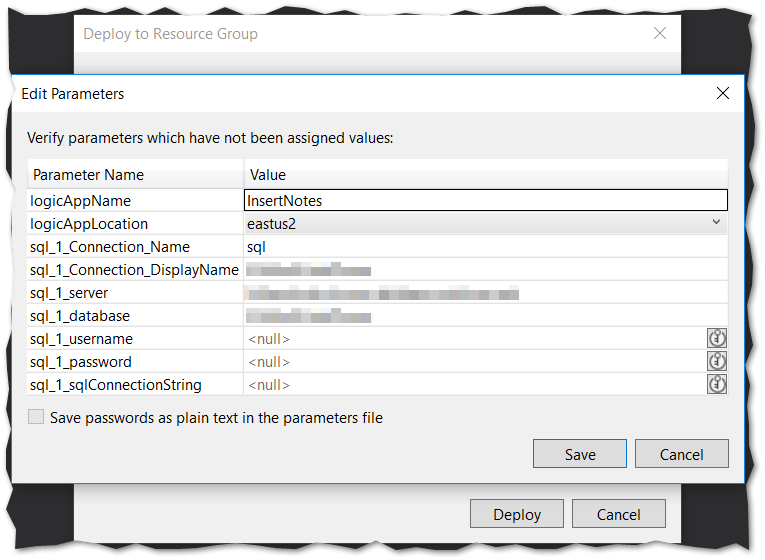
Before you eagerly hit ‘Deploy’, click ‘Edit Parameters’ to assign a meaningful, recognizable name for your new Logic App:
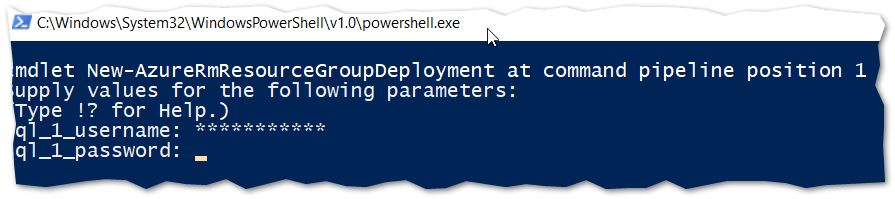
Authorize the deployment by entering your Microsoft credentials and the Logic App will be deployed!
Executing the Logic App
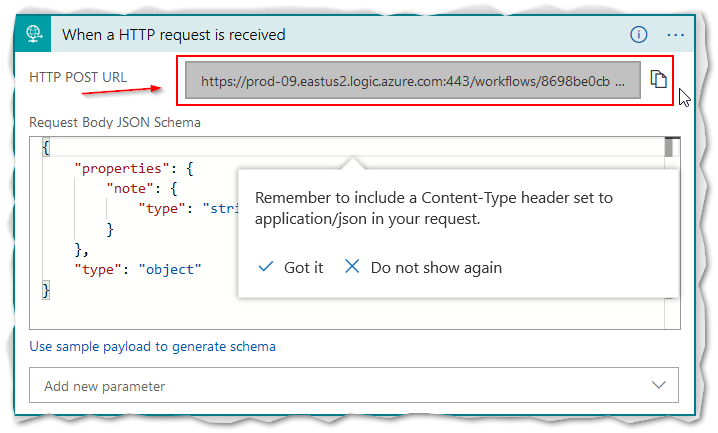
Let’s see what this new Logic App is made of! If you navigate to the newly deployed Logic App in the Azure portal and click 'Logic app designer' to open the visual designer, you will find the assigned ‘HTTP POST URL’:
Firstly, let’s test if the validation is working by submitting an empty note using the Postman client. Make sure to use a POST request and set the ‘Content-Type’ header to ‘application/json’:

If you are greeted by a ‘422 Unprocessable Entity’ response, if works!

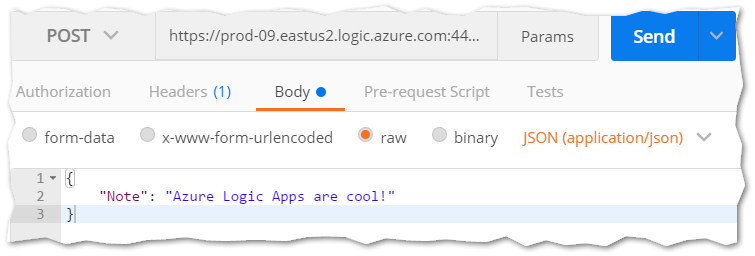
Lastly, let’s insert a new note to the existing SQL Server database:
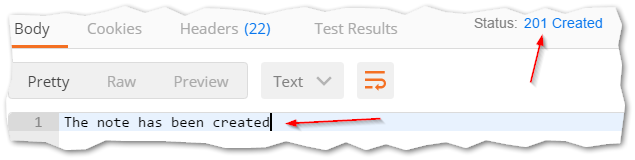
You should receive a ‘201 Created’ response and a message indicating the new note was created, just like an API endpoint!
Query the existing SQL Server database to view the new note:

That’s it! We created an API endpoint that is codeless, serverless and will insert any input parameter to a SQL Server database!
View the Run History
If you navigate to the Logic App in the Azure portal, you will be able to view the run history. This will enable you to immediately identity if any errors occurred, and diagnose issues as they occur.

By opening an individual ‘run’ in the Azure portal, you will be able to identity where the issue occurred, as well as the input, output and response time of each connector: