Using Azure Batch to Orchestrate and Execute Code at Large-Scale
By Steven McLintock onAzure Batch is not a new technology by Microsoft, but for some reason it doesn’t seem to be receiving as much attention as similar Microsoft cloud platforms: Azure Functions and Logic Apps.
Azure Batch has a few benefits over Azure Functions / Logic Apps:
- Reduced cost (Logic Apps are considerably expensive for many executions)
- Avoid outbound connection limit (Azure Functions enforce a strict outbound connection limit)
- Avoid time limit (Azure Functions must complete in a short amount of time)
- Configurable CPU and RAM for compute-intensive workloads
Mark Scurrell of Microsoft can be seen in the walk-through below demonstrating some of the capabilities of Azure Batch.
Getting Started
The first step is to create a batch account in the Microsoft Azure Portal. We will use this account to store the jobs, pools and tasks used for executing our code at large-scale.

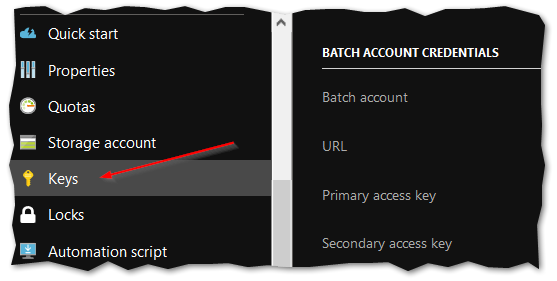
Once created, you can navigate to the new batch account and view the ‘Keys’ associated with the account. These credentials are used when opening a new BatchClient in C#, used to access the batch account programmatically.
Create an application package
You can execute both C# and Python code in Azure Batch. For this example I will create a simple console application in C# to multiply 2 integers. This will simulate how Azure Batch is able to accept one or more arguments and execute code at large-scale in a production environment.
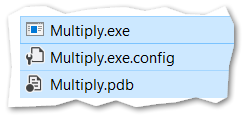
The EXE for our application package will contain the C# code block:
using System;

namespace Multiply
{
    class Program
    {
        static void Main(string[] args)
        {
            int.TryParse(args[0], out int value1);
            int.TryParse(args[1], out int value2);

            int result = value1 * value2;

            Console.WriteLine($"{value1}*{value2}={result}");
        }
    }
}
Zip the EXE and it’s associated files (including dependencies, configs, etc.)
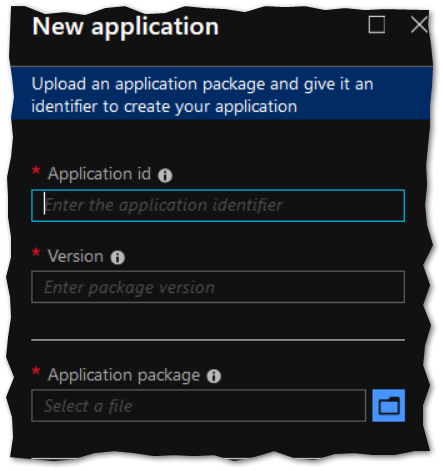
Navigate to ‘Applications’ within your batch account in the Azure Portal and create a new application package. You will need to provide an Application ID (Multiply), Version (1.0) and upload the ZIP.
Use Azure Batch to Execute
To use Azure Batch in C#, you will need to install the Nuget package ‘Microsoft.Azure.Batch’ into your solution.

To begin the C# code to executing code using Azure Batch, open the BatchClient to access the Azure batch account. You will need to use the credentials you accessed earlier in the Azure Portal.
string batchAccountName = "XXXX";
string batchAccountKey = "XXXX";
string batchAccountUrl = "XXXX";

BatchSharedKeyCredentials cred =
    new BatchSharedKeyCredentials(
    batchAccountUrl,
    batchAccountName,
    batchAccountKey);

using (BatchClient batchClient = BatchClient.Open(cred))
{
    // ...
}
Within the BatchClient, we will begin to configure the pool of nodes used to execute the job and associated task(s). Below we are configuring a pool of 2 nodes and associating the application package we uploaded to the pool.
string poolId = "batchpool";

// Create a Windows Server image
ImageReference imageReference = new ImageReference(
    publisher: "MicrosoftWindowsServer",
    offer: "WindowsServer",
    sku: "2012-R2-Datacenter-smalldisk",
    version: "latest");

// Create a VM configuration
VirtualMachineConfiguration vmConfiguration =
    new VirtualMachineConfiguration(
        imageReference: imageReference,
        nodeAgentSkuId: "batch.node.windows amd64");

// Create a batch pool
CloudPool pool = batchClient.PoolOperations.CreatePool(
    poolId: poolId,
    targetDedicatedComputeNodes: 2,
    virtualMachineSize: "STANDARD_A1",
    virtualMachineConfiguration: vmConfiguration);

string appId = "Multiply";
string appVersion = "1.0";

// Associate the application package to the batch pool
pool.ApplicationPackageReferences =
    new List<ApplicationPackageReference>
{
    new ApplicationPackageReference
    {
        ApplicationId = appId,
        Version = appVersion
    }
};

pool.Commit();
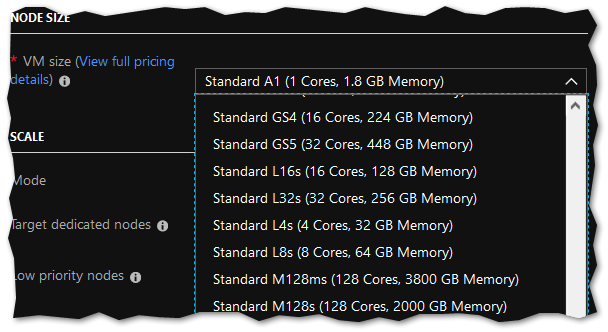
One of the benefits of Azure Batch is the flexibility of configuring the VM used in the pool. If you navigate to ‘Pools’ in your batch account and create a new pool, you will be able to view the many VM configuration options (operating system, CPU, RAM, etc.).
To reduce costs, the pool is created programmatically before the job and associated task(s) are created, and deleted once the tasks are complete.
To run the tasks, create a new job and associate it with the pool:
string jobId = "batchjob";

CloudJob job = batchClient.JobOperations.CreateJob();
job.Id = jobId;
job.PoolInformation = new PoolInformation { PoolId = poolId };

job.Commit();
Create a new task and associate it with the job. In this example we will create 1 task to execute, however in a production environment we could use a loop to iterate through a collection of objects and create multiple tasks to run on many nodes.
List<CloudTask> tasks = new List<CloudTask>();

string appPath = $"%AZ_BATCH_APP_PACKAGE_{appId}#{appVersion}%";

string taskId = "Task1";

string taskCommandLine = $"cmd /c {appPath}\\Multiply.exe 6 4";

CloudTask cloudTask = new CloudTask(taskId, taskCommandLine)
{
	ApplicationPackageReferences = new List<ApplicationPackageReference>
	{
		new ApplicationPackageReference
		{
			ApplicationId = appId,
			Version = appVersion
		}
	}
};

tasks.Add(cloudTask);

// Add all tasks to the job
batchClient.JobOperations.AddTask(jobId, tasks);
Once the task is created and added to the job, we wait for the task to complete, applying a timeout of 30 minutes.
// Monitor task success/failure, specifying a maximum timeout.
TimeSpan timeout = TimeSpan.FromMinutes(30);
Console.WriteLine("Monitoring all tasks for 'Completed'");
IEnumerable<CloudTask> addedTasks =
batchClient.JobOperations.ListTasks(jobId);
batchClient.Utilities.CreateTaskStateMonitor().WaitAll(
addedTasks, TaskState.Completed, timeout);
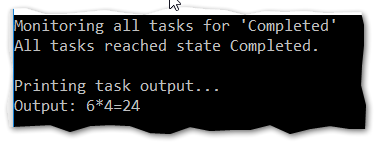
Console.WriteLine("All tasks reached state Completed.");
When the task is completed (regardless if it resulted in an error), we’ll print out the results to the console window.
// Print task output
Console.WriteLine();
Console.WriteLine("Printing task output...");

IEnumerable<CloudTask> completedtasks =
    batchClient.JobOperations.ListTasks(jobId);

foreach (CloudTask task in completedtasks)
{
    string output = task.GetNodeFile(
        Constants.StandardOutFileName).ReadAsString();

    if (!string.IsNullOrEmpty(output))
    {
        Console.WriteLine($"Output: {output}");
    }

    string errorMessage = task.GetNodeFile(
        Constants.StandardErrorFileName).ReadAsString();

    if (!string.IsNullOrEmpty(errorMessage))
    {
        Console.ForegroundColor = ConsoleColor.Red;
        Console.WriteLine($"Error: {errorMessage}");
        Console.ResetColor();
    }
}
Finally, delete the pool (to reduce costs) and terminate the job (to mark it as complete in the Azure Portal).
// Delete the pool
batchClient.PoolOperations.DeletePool(poolId);

// Terminate the job (marking it as completed)
batchClient.JobOperations.TerminateJob(jobId);
If the task was successful, you will be able to view the output of the application package, along with any error messages.
How to use Azure Batch Job Schedule
Please see the follow-up article for useful information on Azure Batch job schedule: https://mclintock.dev/how-to-use-azure-batch-job-schedule/
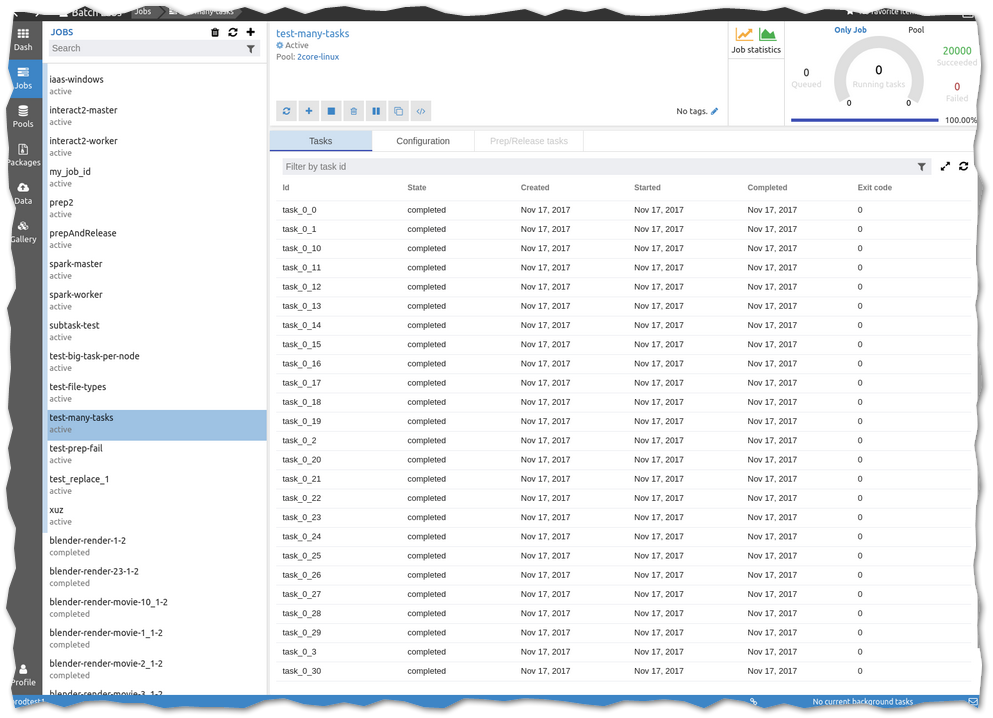
Download and Install Batch Explorer
Microsoft has built a utility for Windows, Mac and Linux to help debug your Batch applications. You can download it here.